Whitewater Rescue Equipment
In whitewater, you should always be prepared for a rescue. Don’t just dress for what your day will hopefully be like – wear clothing and carry equipment that you’ll need for an unforeseen incident.
- 5 general principles of whitewater personal protective equipment (PPE)
- Base layers, wetsuits, and drysuits
- Whitewater helmets
- Whitewater PFDs
- What gear to carry on your body
- River knives and safety knives
- Technical gear for swiftwater rescue
- Rope and throw bags
- Group equipment and river safety gear for expeditions
- Links:
5 general principles of whitewater personal protective equipment (PPE)
We recommend that you gear up with these 5 general principles in mind:
- Dress for the water temperature and prolonged swims, not for the weather
- Be prepared to stay out longer than you’re planning, and for off-trail walking in the case of an emergency situation
- Be ready for a rescue at any time by carrying certain items on your body, to allow quick access
- Distribute rescue gear between several people in the group, instead of keeping it all in one location
- Choose gear that is easy to swim in and avoid hanging things off of you which might cause entrapment
Base layers, wetsuits, and drysuits
Base layers
Clothing choices vary greatly with water and air temperatures.
In a midsummer heatwave on a warm water river, choose clothing to keep from overheating and for sun protection. However, in anything but these warmest conditions, clothing should be chosen for warmth in the event of a long swim.
This is because heat loss in water is much more rapid than in air (more than 20 times!), and because heat loss from evaporation is greater for someone who is wet.
Our cold-water clothing recommendations are to:
- Use materials that are warm when wet – avoid cotton, instead choose synthetics or wool
- Dress in multiple layers to allow adjustments for temperature changes
- Have layers and an outer shell. Layers provide insulation while the outer shell provides protection from wind and prevents water from flowing through your insulating layers
Outer Shells
Generally, paddlers will use either a wetsuit or drysuit to use as their outer layer on the river. Made of neoprene or waterproof fabric, these outer layers are specifically designed to keep you warm in the water and protect you from the wind.
Wetsuits and drysuits are two options for full-body coverage. See below for comparison.
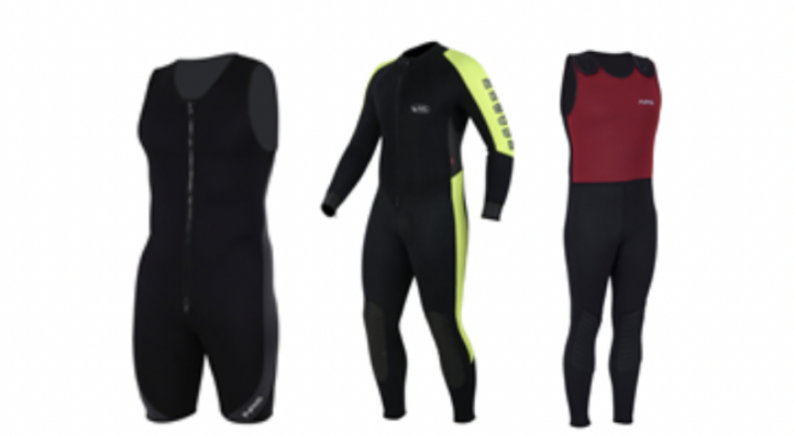
Wetsuits – How they work
Snug-fitting neoprene suit designed to let water in and trap it under the neoprene. Your body warms up the trapped water, providing insulation. Available in different thicknesses and styles (farmer john, shorty, or full-body – see examples)
Wetsuit advantages:
- Less expensive
- Neoprene provides flotation and insulation
- Streamlined for swimming
- Durable and abrasion-resistant (a wetsuit with a tear or hole is still an effective wetsuit)
Wetsuit disadvantages:
- Wet all-day
- Thick wetsuits (like those used for deep water diving) aren’t flexible enough for most paddlers
- Needs to fit well (a loose wetsuit does not trap water effectively)
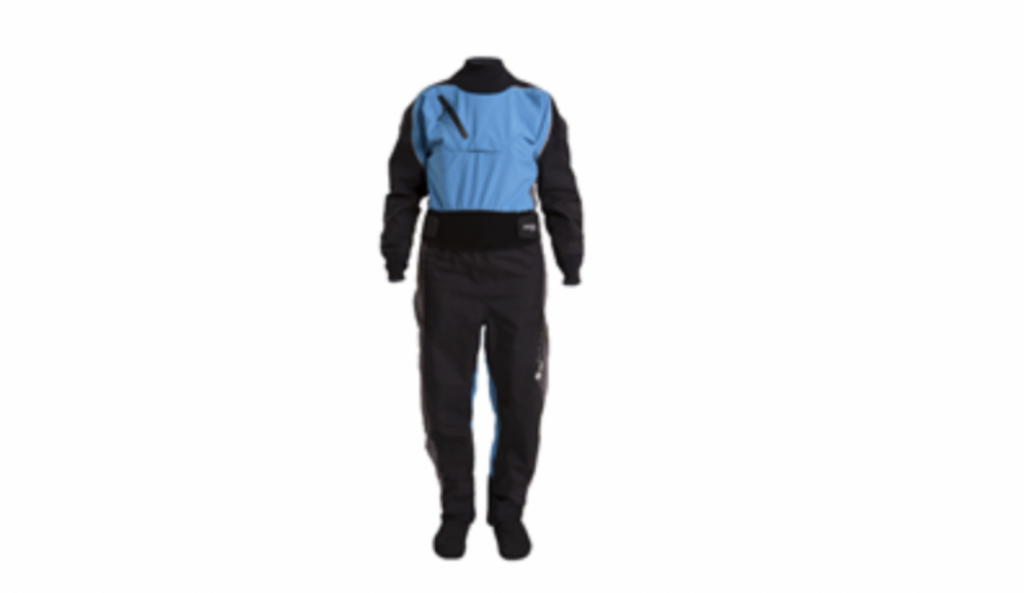
Drysuits – how they work
A waterproof suit made with breathable (e.g. Gore-Tex) or non-breathable fabric. Designed to keep water out so that insulating layers underneath stay dry and provide maximum insulation. Latex gaskets keep water out at wrists and neck. Some have ankle gaskets while others have integrated waterproof socks
Drysuit advantages
- Very warm and comfortable when working well
- Doesn’t need to fit tight, so changes of layering underneath is easy, one suit can fit different people
- Provides barrier when used in polluted or contaminated water
- Dry all day (if it’s a well sealed suit)
Drysuit disadvantages
- Expensive
- More fragile: a drysuit with leaks or a torn gasket isn’t dry, and insulation is diminished. It can fill with water, making swimming difficult
- A looser fit can make it challenging to swim in
Drysuit maintenance
Drysuits can leak through pinholes or tears, as the material becomes less waterproof, or when gaskets dry out and tear. Follow manufacturer recommendations for care and washing of waterproof breathable material, and keep gaskets from drying out. Be especially careful with ankle gaskets or integrated socks. It’s a good idea to wear neoprene socks overtop of drysuit socks to protect them from wear.
Some companies offer pressure testing and patching of pinholes, as well as gasket replacement. There are also instructional videos and kits for DIY gasket replacement. Bringing extra gaskets and glue (seam seal) on expeditions is a good idea!
Other Clothing
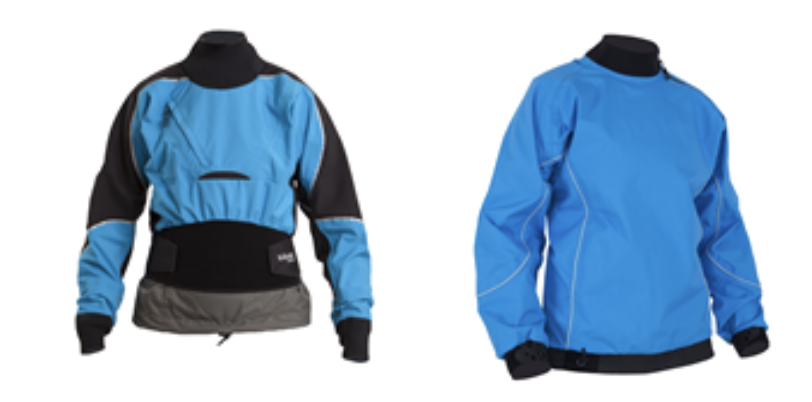
A dry top is similar to a drysuit but just for the waist up. Combined with a spray skirt, it can keep closed boat paddlers dry, but in the event of a swim, it allows water to flow in at the waist.
A splash top (aka paddling jacket) has neoprene gaskets that aren’t waterproof and is more like a low-profile rain jacket with no hood. Either of these works well as a windproof shell layer overtop of a wetsuit or other layers to prevent heat loss through convection and evaporation.
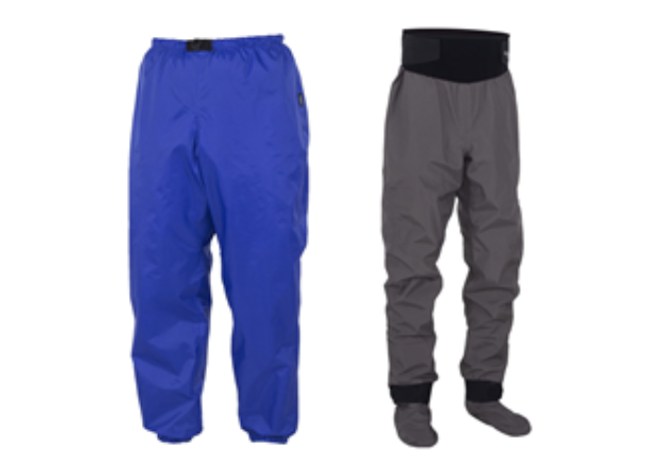
Dry pants and splash pants are waterproof layers for the waist down and can have integrated socks or latex ankle gaskets (dry pants), or neoprene gaskets (splash pants). We recommend caution when using dry pants since they can fill with water, making swimming and exiting the river difficult. Some people choose to remove latex gaskets or cut holes in the ankles of dry pants to avoid this hazard. Bulky firefighter turnouts present similar disadvantages and can be dangerous to swim in. First responders should have river specific gear for use in whitewater rescues.
Dry pants or rubber hip waders are sometimes used for fishing or conducting scientific research in rivers with the current. We recommend that people choosing to use this gear practice taking it off while swimming in current and use caution when choosing appropriate sites to work in.
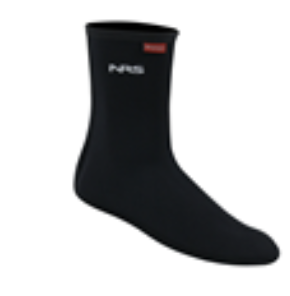
Neoprene socks work just like a wetsuit and are a good addition to any layering system since your feet spend the most time in the water. Additionally, if you are wearing a drysuit or dry pants with built-in ‘feet’, wearing neoprene socks over top will protect the more delicate fabric from abrasion.

For your hands, neoprene mitts or gloves are very warm but can make it more difficult to hold a paddle or other equipment. Pogies are often used by paddlers to allow direct contact with the paddle. The disadvantage is that they are of no use when swimming.
Footwear
Appropriate footwear is important not only for swimming and walking in rapids but for walking the shoreline of the river or hiking out through the woods. Pick river shoes that:
- Won’t fall off while swimming
- Have a tread that grips well on wet rocks and a good enough sole to hike in (avoid neoprene socks and soft booties)
- Are easy to swim with and drain water (avoid heavy hiking boots and rain boots which act like anchors)
Protect your toes (we recommend against sandals since they expose you to an avoidable hazard)
Whitewater helmets
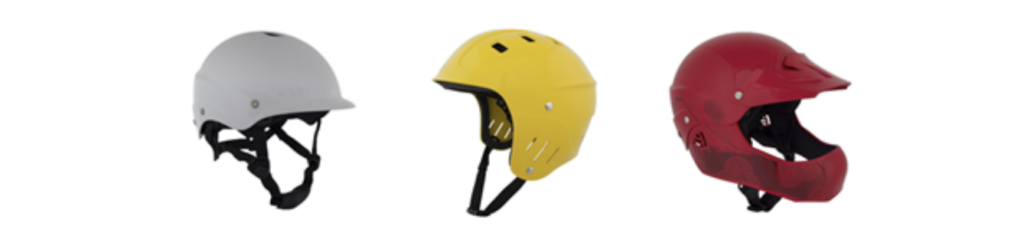
Your helmet should fit well and be specifically designed for use in whitewater.
High visibility colours will make you easier to see and find. Whitewater helmets are designed for multiple impacts on the top, sides, and back of the head.
Whitewater helmets do not have large brims because brims act like scoops in the water and could transfer force on impact to the head and neck, causing injury. Helmets with brims can be difficult to swim with and restrict visibility. Double brim firefighter helmets are an extreme example of this and they should not be worn for whitewater rescue.
Some helmets have ear flaps that offer additional protection, but they may make it more difficult to hear. Paddlers running very challenging or high consequence whitewater often choose a full-face helmet.
Whitewater PFDs
Your personal flotation device (PFD) should:
- Fit without slipping off when pulled from above with your arms raised above your head
- Balance comfort and mobility with flotation
- Have enough pockets to fit items you want immediate access to
- Be brightly coloured
PFD classification
PFDs are given a classification from Type I to V by the US coast guard. PFDs used for whitewater are:
Type II – PFD designed to keep unconscious subject’s face above water (e.g. kids PFD)
Type III – Classic PFD considered a “flotation aid” which will not reliably turn a subject on their back
Type V – Any PFD designed for a specific use. Whitewater rescue PFDs fit into this category.
Type I PFDs are high float ocean PFDs and the Type IV category is for throwing aids.
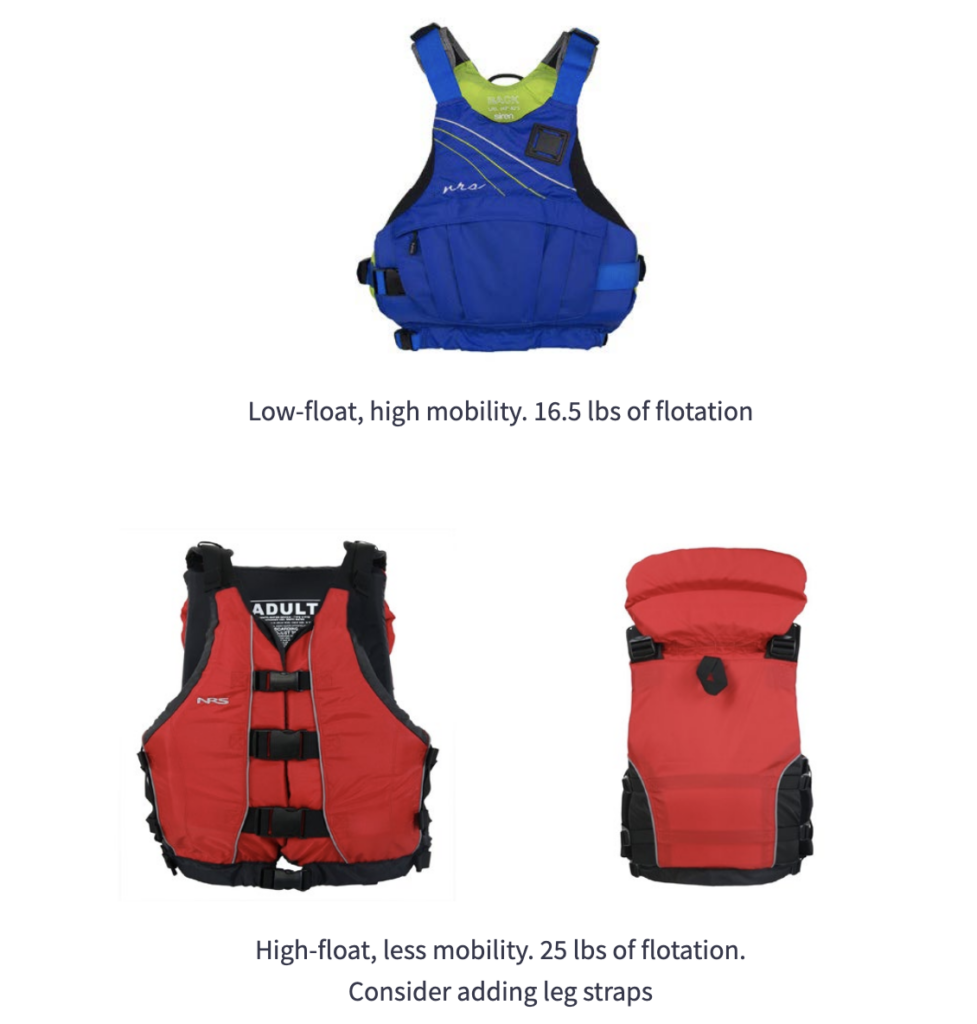
A high float PFD with 22 to 27 lbs of flotation is a good choice for less confident swimmers or anyone who tends to float lower in the water.
The standard PFD for children has lots of flotation, a flap behind the head, and thigh straps. High float PFDs with thigh straps are a good choice for raft trip participants as well as rescue subjects. The thigh straps prevent ‘one size fits all’ PFDs from accidentally slipping off when in the water – which is a real and potentially disastrous possibility for an unconscious person. The head flap helps keep the face of an unconscious wearer out of the water, and the added flotation keeps swimmers above the surface.
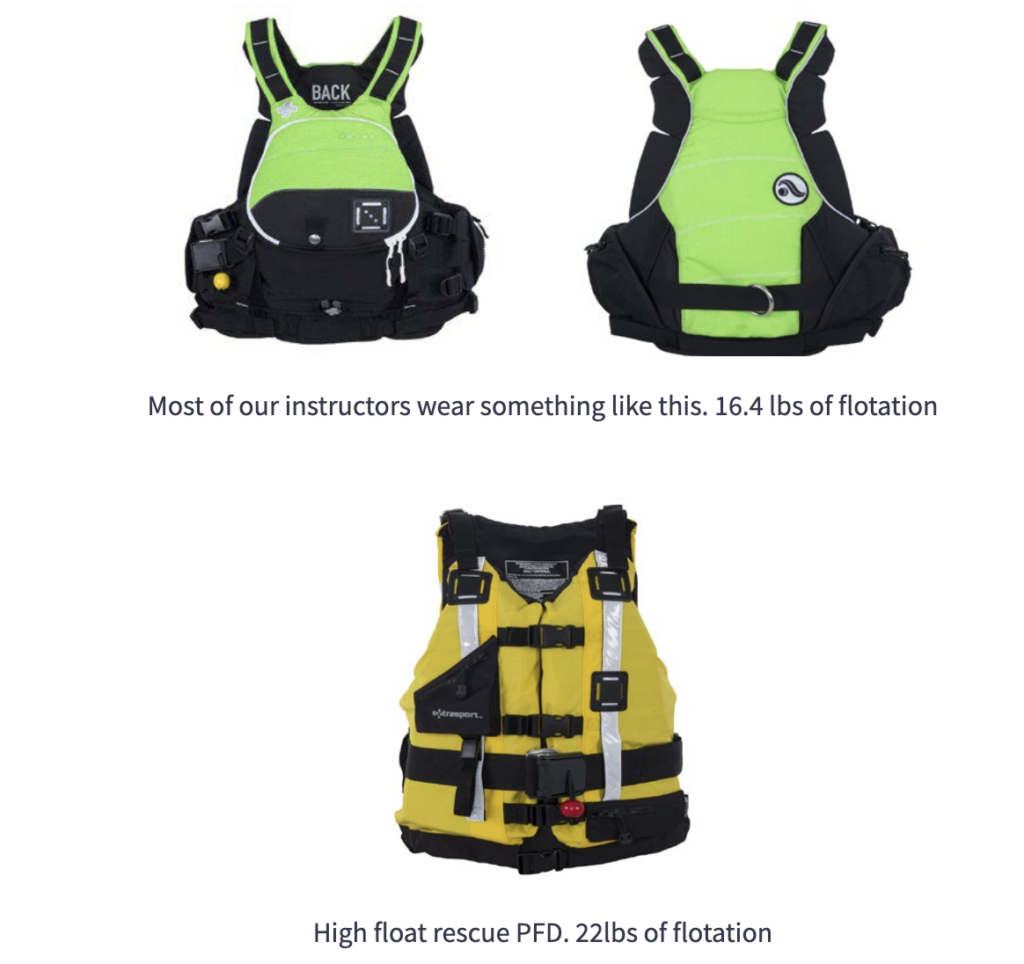
For more mobility, while swimming or paddling, choose a low float PFD with 16 to 18 lbs of flotation.
Rescue PFDs with quick-release belts
Rescue PFDs have an integrated quick-release belt sewn in, which is necessary for tethered “live bait” rescues. Systems with belts that are purchased separately are often problematic.
NOTE: While quick-release belts can be useful tools, they take significant training and practice to use them and they can introduce extreme risk to the rescuer if used improperly. This is because the rescuer on tether is attached to a rope, and if the rope get’s tangled or snagged on something on the bottom of the river in current, the rescuer will get pulled underwater, and if for any reason the rescuer isn’t able to release their belt (either because of improper set-up, or because they are unconscious or injured, or because they panic or forget how), they will drown if nobody can get to them to release the belt for them or cut the rope.
What gear to carry on your body
We recommend carrying technical gear and safety equipment on your body—so you have it on hand when you need it.
First responder teams may arrive on a rescue scene with a central “rack” of all of their rigging gear. These teams should practice distributing gear to individual rescuers, and each rescuer should be confident carrying equipment appropriately.
The following items can be carried on your body or your PFD. Store them in pockets or attach them in a way to avoid dangling gear, which could be an entrapment hazard.
The numbered items in the photo below correspond to the numbers [1] to [10] in the descriptions below.
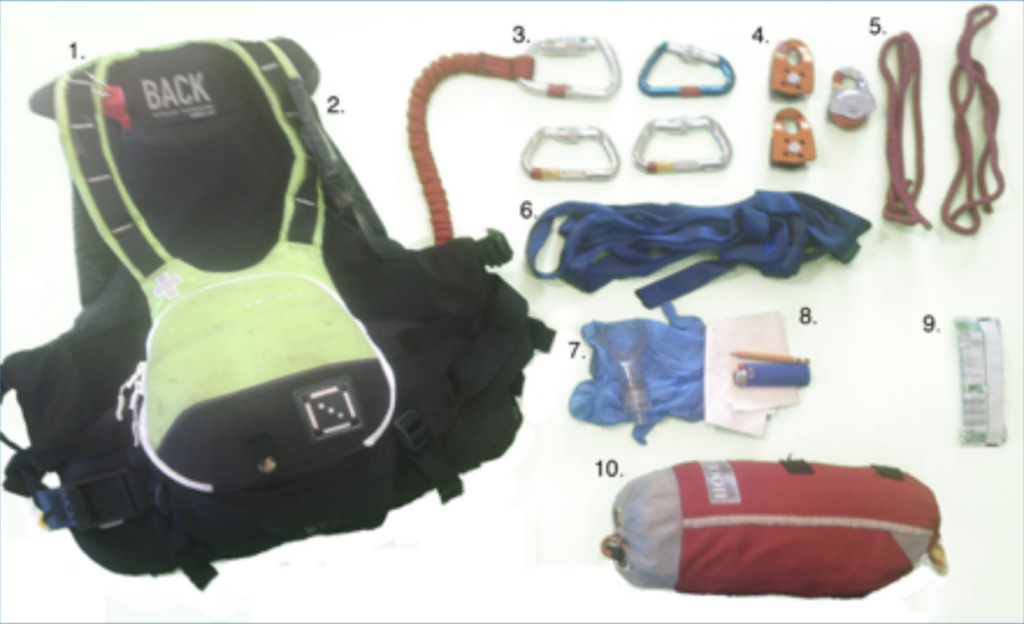
[1] A whistle allows communication across long distances in a loud river setting. We recommend using whistles conservatively, so they get people’s attention when needed. The internationally recognized whistle signals we teach on courses avoid confusion when signalling. [2] A rescue knife—see the safety knife section below
[3] Carabiners, [4] pulleys, [5] accessory cord, and [6] webbing—see ‘rigging gear’ section below
[9] Food can be considered safety equipment since being ‘fuelled’ is directly related to your performance, decision-making, and warmth in a rescue situation. Carry a quick energy snack in your PFD pocket.
[10] Throw bag—a bag containing 15-25 metres of floating rope. See the full section on throw bags for more detail on design and use.
Other items to carry on your body, so you are rescue ready
- Medical gloves & pocket mask [7]
- Waterproof paper and pencil [8]
- Lighter [8]
- Watch to track vital signs, remaining daylight, submersion time, etc.
- Sunscreen
- Duct tape
- Glow stick
- Light/headlamp
- Zip ties
- Towline (optional and with training) [3]
What, how much, and how to carry The ‘4-3-2-1-1’ System
Rigging gear is best distributed among the group and should be carried in PFD pockets when possible, or tight to the body. A reasonable amount for one person to carry is:
- Four locking carabiners
- Three pulleys
- Two strands of 6mm accessory cord
- One webbing ‘flip line’
- One high-quality throw bag

When attached externally, carabiners should always be locked to avoid accidentally clipping to something else. Throw bags can be attached to the quick-release belt of a PFD or may come with their own quick-release belt. Never attach a rope or even a closed throw bag to yourself without a quick release system!
River knives and safety knives
A rescue knife is an essential piece of gear for whitewater rescue. Follow these recommendations to ensure it is an effective tool when you need it:
- Keep it accessible: Your river knife should be easily accessible with either hand. We recommend attaching the sheath to one of the shoulder straps of your PFD with zip ties. If it is at the base of your shoulder strap, it is less likely to hit rocks and potentially break when swimming, and it won’t get in the way when climbing into a raft or other boat.
- Use it and keep it sharp: We recommend using your knife for non-emergency applications to develop muscle memory for removing it from the sheath and keeping track of how sharp the blade is.
- Don’t lose it or turn it into a hazard: Your knife should be attached so that it will not fall out by accident. Choose a knife with an effective locking system for the sheath. Avoid using long or stretchy knife tethers, which can be an entrapment issue or can “slingshot” your knife.
Some people choose to carry two knives on their PFD (the second one inside the pocket) in case one gets dropped during a rescue or lost—since it’s such an essential piece of safety and survival gear.
River knife placement
Technical gear for swiftwater rescue
Carabiners
Carabiners are for linking things together.
Factors to consider when choosing carabiners:
- Material: Aluminum carabiners, though not as strong as steel, are usually strong enough for use in river rescue. They are also significantly lighter and cheaper than steel.
- Shape: Pear-shaped carabiners, also known as ‘rescue’ carabiners, have bigger openings making it easier to clip more things into them. This shape is also best to create a Munter Hitch (a friction hitch that can be used for repelling or lowering).
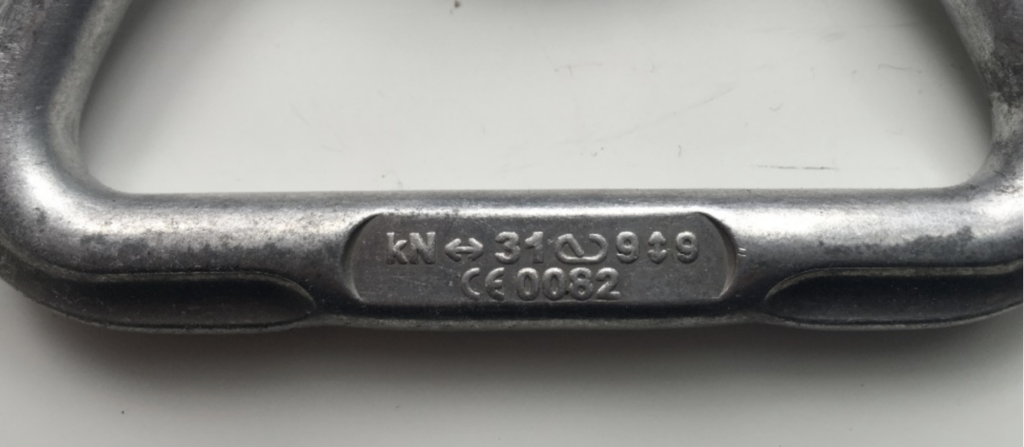
- Strength: All rescue equipment is tested in production and given a strength rating. This can be listed in kiloNewtons (kN), kilograms (kg), or pounds (lbs). kN is a measurement of the maximum force which can be safely applied. Kg or lbs measure the mass of the maximum static load (gradually putting tension on the equipment). The following approximate conversion is an easy way to switch between these ratings: 1kN = 100kg (static) = 200 lbs (static)
The strength ratings of a carabiner are engraved on it in the form of a legend. In the example (above), the first number (kN ↔ 31) represents the strength when loaded lengthwise. The second number (9) represents the strength if the gate is open. The third number (9) represents the strength if ‘sideloaded’.
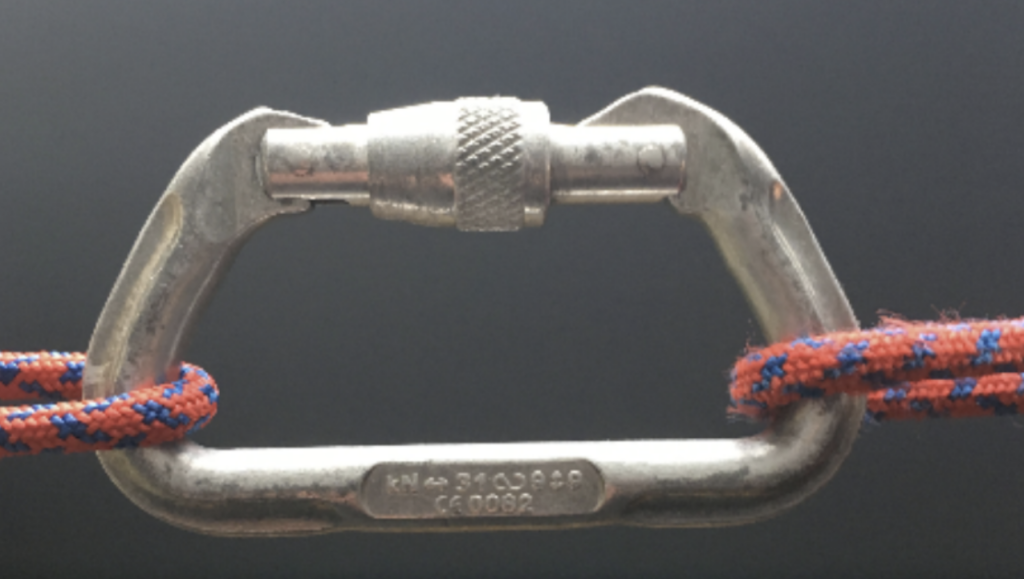
When using a carabiner in a rope system where there will be significant forces involved it should be loaded along its spine (example below).
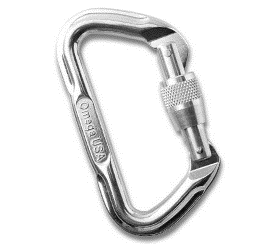
Locking vs non-locking
A locking carabiner can be locked so that the gate cannot open unintentionally.
There are certain applications in whitewater rescue when you need a locking carabiner:
- One is when connecting a rope to a rescuer’s quick-release harness on their PFD (known as a ‘live bait’ rescue) where a non-locked carabiner can accidentally clip onto another part of the PFD making the system unreleasable.
- Another is when using a carabiner in a rope system where significant force will be applied, and a non-locking carabiner can come open, creating a weakness and potential failure.
Because of this, we recommend only bringing locking carabiners with you on the river. You don’t need to lock them all of the time, but you’ll have the lock there for when you need it.
Examples
Steel carabiner—very strong but expensive and heavy
Pear shape aluminum locking carabiner

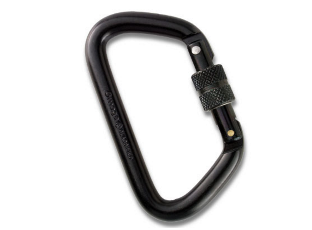
Auto-locking carabiner. It’s nice to have at least one of these on you.

‘D’ shape aluminum locking carabiner
Pulleys
Pulleys reduce friction in rope systems by increasing the radius of the bend in the rope and having the rope slide over a low-friction spinning wheel.
Pulleys come in a variety of shapes, sizes, and designs:
- Bell-shaped Prusik minding pulleys (PMP) are useful for many of our applications. If you’re using the ‘4,3,2,1,1’ system for what gear to carry, make sure at least one of your three pulleys is a PMP.
- Large pulleys are used for larger ropes, but anything over 2 inches becomes hard to fit in a PFD pocket.
- Pulleys with metal wheels are more durable for repeated use but are more expensive than plastic wheel pulleys.
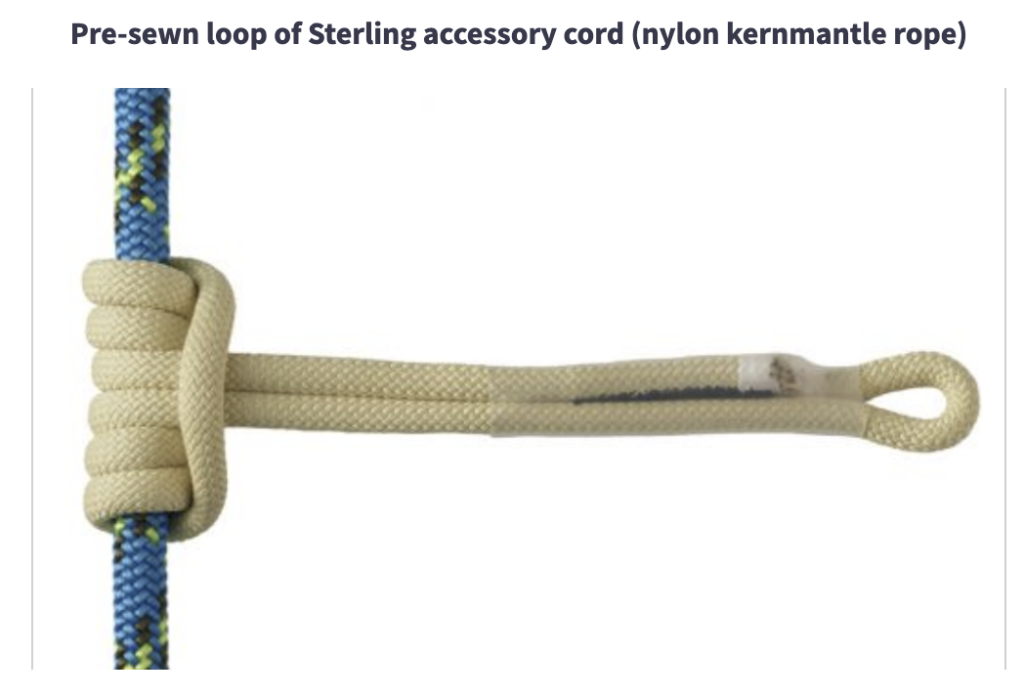
Accessory cord and prusik loops
Accessory cord is nylon kernmantle rope, often tied into a loop to tie a prusik knot. We recommend carrying at least two 1.3m lengths of 6mm accessory cord. 6mm will grip or ‘cam’ well onto your 8-9mm high strength throw line.
If you’re using bigger diameter (10mm+) rescue lines, you’ll want to have an 8mm cord for your prusik loops.
Alternatively, instead of strands of accessory cord, you can carry pre-sewn loops. The advantages of pre-sewn loops are that they are lower profile (no knot), and you don’t have to tie knots. The disadvantages are that they’re more expensive and, in some ways, less versatile pieces of gear.

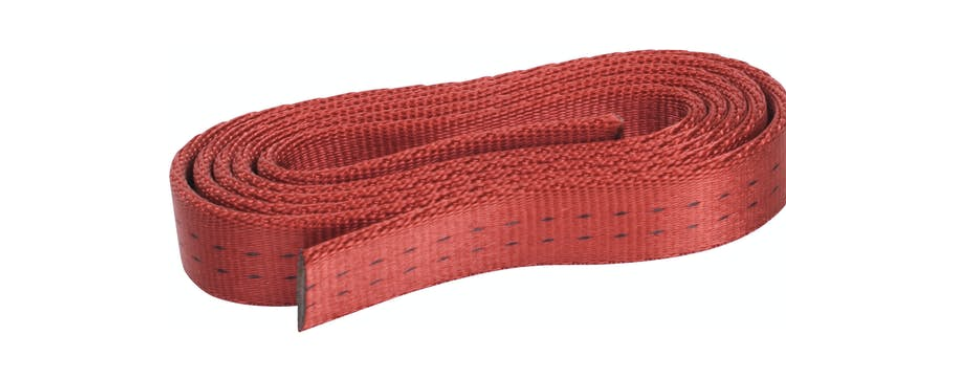
Webbing
25mm (1”) tubular webbing: made of nylon is like a flat rope and is very strong (18kN/~4000 lbs). Since nylon is very abrasion-resistant, webbing is ideal for anchoring to trees and rocks. It can also be used for quickly putting an anchor on a load in the river, such as a kayak, canoe, or raft.
Flip line:
A 4 to 5-metre length of webbing tied into a loop with a water knot can be worn around the waist like a belt and clipped together with a carabiner.
This is often called a flip line or guide belt since raft guides use it to help with righting a flipped raft.

Even if you aren’t raft guiding, we recommend that everybody carries a strand of 25mm (1”) tubular webbing because it has so many useful applications. For example, besides anchoring, it can be used as a harness, reaching aid, or to tie your boat to shore quickly.
Rope and throw bags
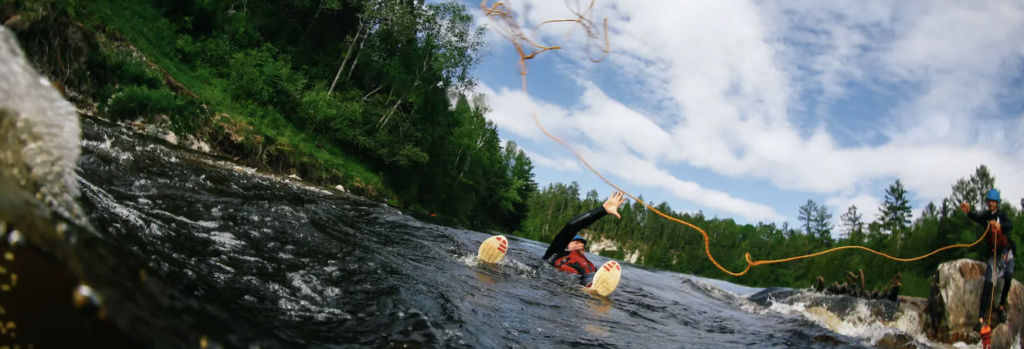
Throw rope is floating rope (usually found in throw bags) used for shore-based throwing rescues and to pendulum a person or gear in the current.
Besides throw rescues, rope has many other applications in river rescue including transportation systems, equipment retrieval, anchoring, and more.
Many throw bags contain rope that is strong enough for throw rescues, but not strong enough for these other uses. For this reason, many groups carry high-strength rescue rope in addition to their throw bags or they carry throw bags containing high-strength throw line.
Read the Throw Bag and Rope Rescues blog post here, for detailed information on throw bags and rescue rope.
Group equipment and river safety gear for expeditions
The following items are standard on expeditions, but an equipped team should consider carrying them on day trips (and rescue missions).
These things are usually too big to carry on your body, and you wouldn’t typically have one per person, but you can split them up amongst your group and stash them in separate boats, or an emergency response vehicle.
- Communication device (phone, beacon, radio etc.)
- Emergency contact list and safety plan
- First aid kit (see packing list) and medications
- Maps / compass / GPS
- Extra rope and rigging gear
- Spare paddle(s)
- Lightweight tarp or tent fly (for shelter, hypothermia wrap, or improvised patient carries)
- Fleece blanket (for padding a splint, hypo wrap etc.)
- Lightweight camping mattress (insulation for an injured person, splint, bivvy-ing out etc.)
- Folding saw or machete
- Repair kit
- Extra food and fishing tackle
- Extra clothing layers
- Extra knife, lighter/matches, and fire starter
- Water purification and water container
Links:
Training: Whitewater & Swiftwater Rescue Training Course Details
Read more: How To Carry Your Webbing Flip Line — For Whitewater
Read more: This is How You Swim Rapids — Whitewater 101